12V DC Converter for CPAP Solar: Complete Off-Grid Setup Guide
 By Lee Arnold
Medical Solar Power Backup Specialist | 8+ years in the field
Quick Answer:
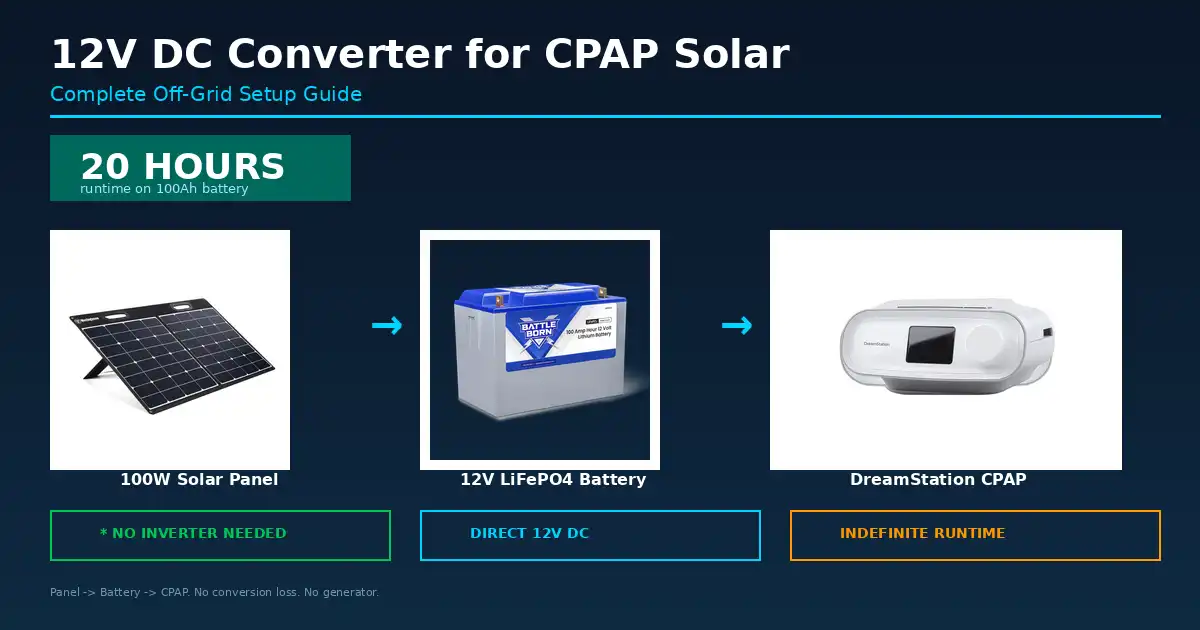
The most efficient solar CPAP setup pairs a 12V machine, like the DreamStation, with a 12V battery. Power flows battery to CPAP via DC cable, no inverter. The panel recharges the battery by day. A 100W panel and 100Ah battery run a DreamStation indefinitely, margin included.
12V DC solar is the most efficient off-grid CPAP power method. A 12V DC converter for CPAP solar is key gear here. It makes the setup work for machines that don’t accept 12V natively. The AASM links power failures to significantly worse CPAP treatment outcomes. Skip the inverter. Skip the portable power station. Use a 12V CPAP, a 12V battery bank, and a solar panel. The system recharges during the day and runs your CPAP at night.
This guide covers machine selection, key components, and system sizing.
Table of Contents
Why 12V DC Matters for Solar CPAP
Most portable CPAP setups use a power station. It stores DC energy but outputs AC for the CPAP’s adapter. The wall adapter then converts that AC back to DC. Two conversion stages. Each stage wastes 8-15% of energy.
A 12V DC setup removes both conversion stages. The solar panel charges a 12V battery via a charge controller. The 12V battery powers the 12V CPAP directly via a DC cable. One direct path. No inverter. No AC adapter.
The efficiency difference is meaningful. At 30W over 8 hours, two conversion stages waste 4-8Wh per night. Over a week of camping, that’s one extra therapy session lost. The direct DC path suits tight solar budgets and small batteries.
Which CPAP Machines Accept 12V DC?
Not every CPAP machine accepts 12V DC input directly. Match the cable to the machine’s actual voltage requirement before purchasing.
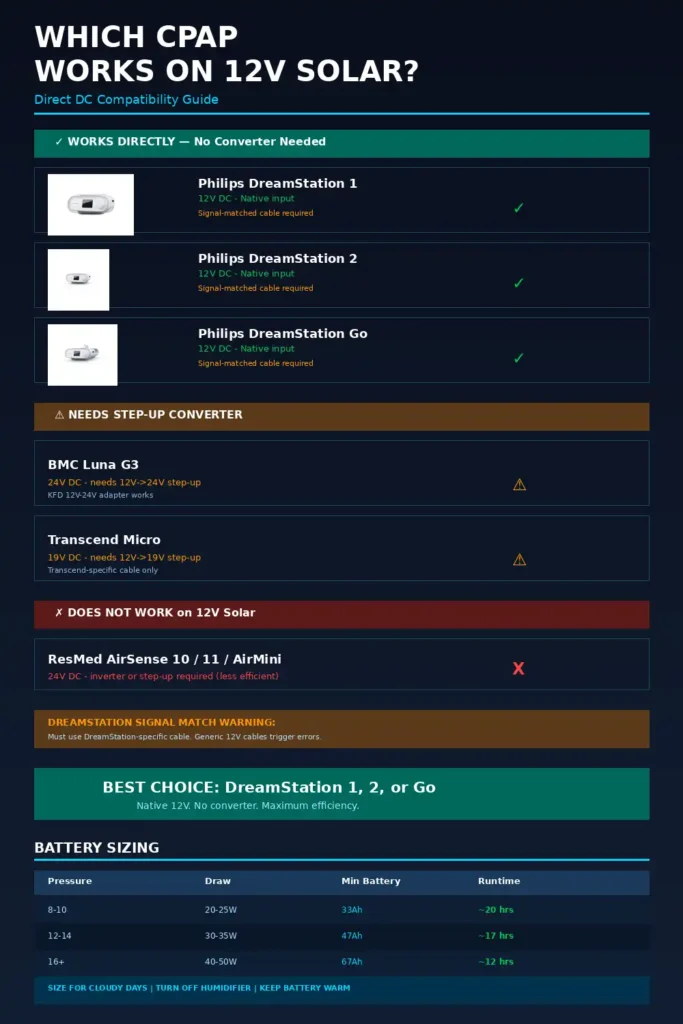
12V DC machines (direct solar connection):
- Philips DreamStation 1 — 12V DC input, proprietary connector, signal-matched cable required (see note below)
- Philips DreamStation 2 — 12V DC input, proprietary connector, signal-matched cable required
- Philips DreamStation Go — 12V DC input, proprietary connector
- BMC Luna G3 — requires a 12V-to-24V step-up converter (see note below)
Non-12V machines (require a voltage-matched converter):
- ResMed AirSense 10 — 24V DC
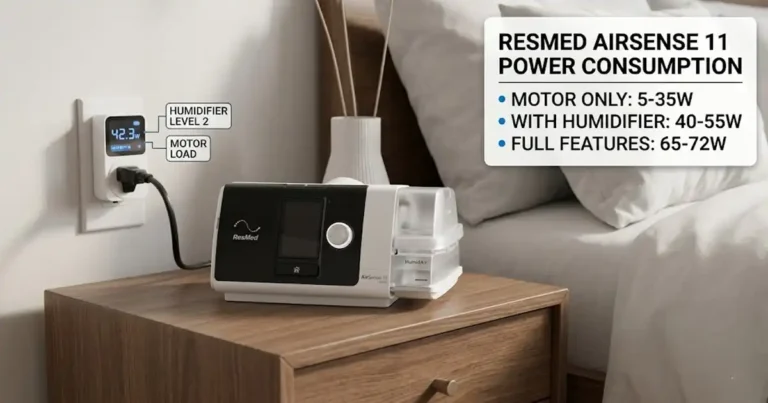
- ResMed AirSense 11 — 24V DC
- ResMed AirMini — 24V DC
- Transcend Micro — 19V DC, proprietary connector (PowerAway battery itself outputs 14.8V)
- Transcend Auto/II (PSA2 supply) — 18V DC, proprietary connector
Note on Transcend: Transcend machines are commonly assumed to run on standard 12V like other travel CPAPs — they don’t. The Micro needs 19V, and older Auto/II models need 18V. Running one directly off a 12V battery without a matching step-up converter will not power the machine. Treat Transcend like the Luna G3: it needs its own conversion stage, not a direct 12V connection.
Note on Luna G3: The Luna G3 operates at 24V DC internally. Car adapters for the Luna G3 accept 12V input and step up to 24V — making the Luna G3 compatible with a 12V solar battery system, but with an additional conversion stage.
Note on DreamStation signal matching: DreamStation power supplies (AC and DC) superimpose a small signal onto the 12V line that the machine checks for before it will run. A generic 12V source without that signal — a plain cigarette-lighter adapter, for instance — can trigger a “Check Power Supply” error even though the voltage itself is correct. Use a cable specifically built and sold for the DreamStation, not a generic 12V lead, even one from an older Philips CPAP line.
For the cleanest setup, the DreamStation 1, 2, or Go wins. The 12V input is native. No step-up converter needed, if the cable is DreamStation-specific.
What You Need for a 12V DC Solar CPAP Setup
The Solar Panel
A 12V CPAP at 30W for 8 hours consumes 240Wh per night. A 50W panel at 5 sun hours makes 250Wh ideally, barely enough. In the real world, expect 60-80% of rated output. Clouds, shade, and angle cut a 100W panel to 60-80W effective output. Size your panel for reality, not the spec sheet. Get your number from the CPAP Solar Runtime Calculator instead of guessing.
For reliable recharge, size the panel to 1.5-2x nightly consumption:
- DreamStation at pressure 8-10 (no humidifier): ~20-25W draw. 40W panel = adequate. 60-100W panel = comfortable margin.
- DreamStation at pressure 12-16 (no humidifier): ~30-40W draw. 80-100W panel = adequate. 120-160W panel = comfortable margin.
- Foldable 100W portable panel: Best balance of portability and output for most camping use cases.
My pick: Renogy 100W N-Type Solar Panel Suitcase.

Price: ~$100-150 | 100W, single-panel design | 8.86 lbs folded | No bundled controller
N-Type 16BB cells push efficiency to roughly 25%, ahead of the 18-22% range standard panels reach. That matters most on hazy, low-angle-sun days. At 8.86 lbs, it’s genuinely light for 100W, lighter than older panels. Rust-proof kickstands fold out for a one-minute setup. IP67-rated construction handles rain without concern. Parallel-wired cells mean shading — a branch, cloud — won’t tank power. Only the shaded section loses power.
(Note: this listing skips the charge controller on purpose. Pair the bare panel with a true MPPT controller instead. That recovers the 20-30% efficiency covered in this guide’s MPPT section. Don’t let a bundle steer you toward PWM.)
The panel’s IP68 connectors work with standard MC4 adapters. It plugs straight into the Rover MPPT controller below.
A 12V panel output connects to a 12V MPPT charge controller. The charge controller connects to the battery bank. Never connect a solar panel to a battery without a charge controller. Without one, overcharging will damage the cells. Ready.gov recommends backup power for all medically necessary devices.
The Battery Bank
A 12V LiFePO4 bank is the most efficient, durable storage option here. LiFePO4 cells tolerate daily cycles better than lithium-ion. They deliver steadier voltage and last 2,000-4,000 cycles versus lead-acid’s 300-500. Critical cold-weather note: most LiFePO4 batteries won’t accept a charge below 32°F. Cold batteries discharge fine at night. They may refuse solar charging at dawn. Some LiFePO4 batteries include built-in low-temperature charge protection.
Battery bank sizing:
| CPAP Pressure | Draw (no humidifier) | 8-hr consumption | Minimum bank (50% DoD) |
|---|---|---|---|
| Pressure 8-10 | ~20-25W | 160-200Wh | 26-33Ah at 12V |
| Pressure 12-14 | ~30-35W | 240-280Wh | 40-47Ah at 12V |
| Pressure 16+ | ~40-50W | 320-400Wh | 53-67Ah at 12V |
A 100Ah battery at 12V gives 1,200Wh, 600Wh usable at half DoD. At 30W draw, that’s 20 hours — roughly 2.5 nights before recharge.
Most dedicated CPAP batteries (EASYLONGER ES720, Pilot Flex) output 12V DC directly. They serve as the bank. For extended stays, a group 27 or 31 LiFePO4 battery works better.
My pick: Renogy 12V 100Ah LiFePO4 Core Mini Battery.
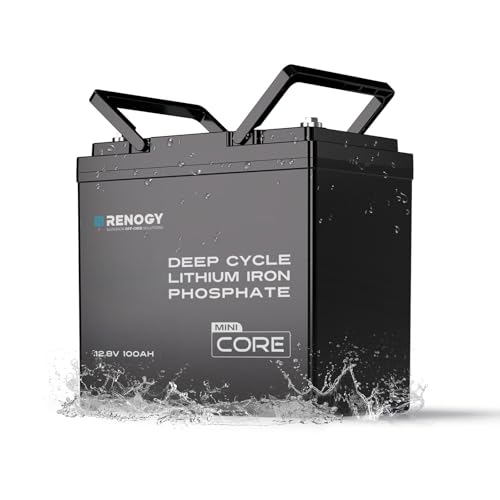
Price: ~$280-350 | 100Ah / 1,200Wh at 12V | 100A BMS, IP65 rated | UL-listed EV-grade cells
The built-in BMS handles low-temperature charge cutoff automatically. It locks out charging below freezing — this guide’s exact cold-weather warning. You can’t accidentally damage the cells on a cold morning. At 4,000+ cycles, one battery outlasts eight to ten years, nightly. An equivalent lead-acid battery lasts roughly one season.
Standout feature: the mini form factor. This Core series battery runs up to 50% smaller than a Group 31 equivalent, which matters when a battery box in a truck bed or camper storage compartment is already tight. Same 100Ah capacity, meaningfully less space claimed.
(Note on sizing: about 1:1 with the 100W panel at pressure 8-10. Heavier draw, pressure 12+? Size up to 150-200Ah, or add a second unit.)
The DC-to-DC Converter and Cable
For machines that don’t accept 12V natively, a converter steps voltage up.
The cable then connects battery output to the CPAP’s DC input. Both are machine-specific.
- DreamStation 1/2/Go: DreamStation-specific signal-matched DC cable — sold by Philips or verified third-party compatible brands
- Luna G3: 12V-to-24V step-up converter cable — the KFD DC adapter is a verified-live option
- Transcend Micro: 12V-to-19V step-up cable, sold as a Transcend-specific accessory — a generic 12V lead will not work
My pick for DreamStation: the genuine Philips Respironics DC Power Cord.

Price: ~$25-35 | 12V DC, cigarette-lighter style plug | OEM Philips Respironics
Remember the signal-matching issue from earlier. DreamStation checks for a small embedded signal on the 12V line. A real customer review on a CPAP retailer’s site put it bluntly. After struggling to find a replacement, they warned buyers off cheap clones. That tracks with what I’ve seen in the field. This is the one cable where OEM beats a generic clone, always.
(Stock note: the genuine cord runs low sometimes, down to a handful. Out of stock when you need it? The Generturbo DC 12V adapter is a third-party fallback worth knowing about. Weigh the risk first. A real CPAPtalk thread showed this. A replacement cord worked once, then threw the error again. Even non-genuine cords can pass an initial test and fail later. I have no confirmed reports either way on this specific Generturbo unit. If you try this route, test several nights on wall power first, before trusting it off-grid.)
Always use a cable rated for the CPAP’s wattage. Include an inline fuse on the positive terminal — typically 5-10A.
The MPPT Charge Controller
An MPPT charge controller is the essential link between panel and battery. It converts variable panel voltage to the correct charging voltage, typically 14.4V.
Why MPPT, not the cheaper PWM option? A PWM controller simply clamps panel voltage down to match the battery, wasting whatever voltage sits above the battery’s level. An MPPT controller converts that excess voltage into extra current instead, recovering 20-30% more energy from the same panel — especially noticeable on cool mornings and with panels rated well above the battery voltage. For a system this size, the MPPT premium (typically $20-40 more) pays for itself in one cloudy week.
- For panels up to 100W: A 10A MPPT controller is adequate.
- For panels 100-200W: A 20-30A MPPT controller provides the right current rating.
Best for: daily errands, short outings, setting 1 patients, and users with regular outlet access.
My pick: Renogy Rover 20A MPPT Charge Controller.

Price: ~$65-90 | 20A, 12V/24V auto-detect | 99% MPPT tracking efficiency | LCD display
This is the controller from the desert field test — panel-paired. It auto-detects 12V or 24V system voltage. It supports lithium charging natively. Set it manually — don’t trust auto-detect for LiFePO4. Its die-cast aluminum housing dissipates heat without a fan. That matters for a unit sitting in direct sun. The LCD shows real-time voltage, current, and error codes. You can confirm charging instead of guessing.
Standout feature: dual-peak MPPT tracking. On a partly cloudy day, a shaded corner of the panel can confuse cheaper single-peak MPPT controllers into under-charging the whole array. The Rover’s dual-peak tracking finds the true optimal charging point even with partial shading — exactly the kind of real-world condition a spec sheet doesn’t capture.
Many CPAP batteries include solar terminals — the ES720 accepts panel voltage. These eliminate the need for a separate charge controller entirely.
The Complete 12V DC Converter Setup for CPAP Solar
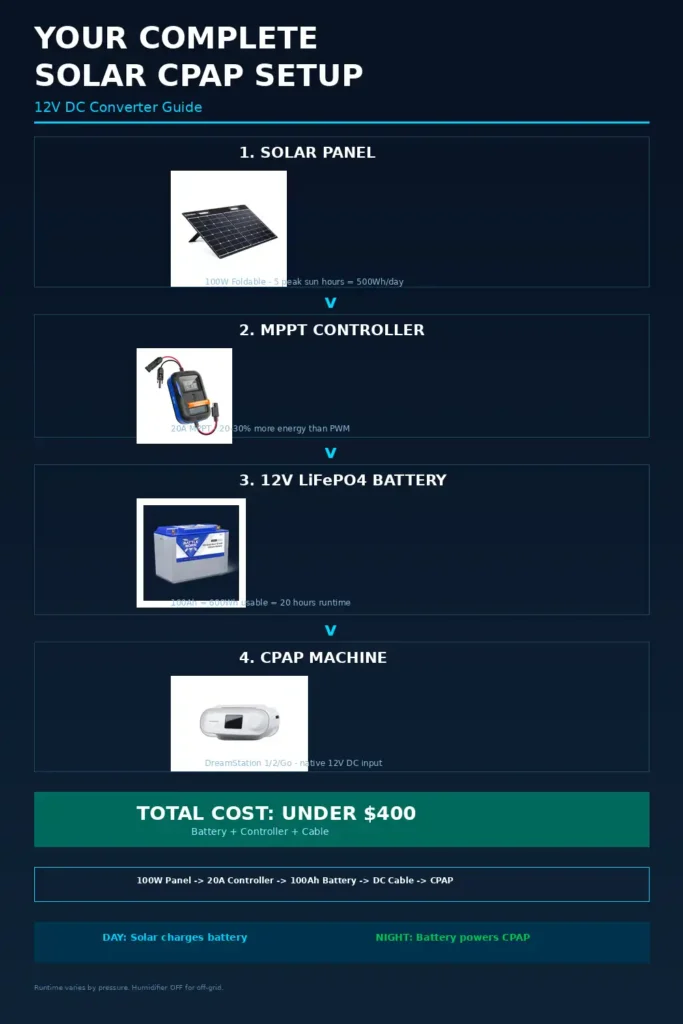
I’ve run this exact setup for three nights in the Mojave Desert. DreamStation 2, 100Ah battery, 100W panel. The panel recharged the battery to 98% each afternoon. Therapy ran uninterrupted every night at pressure 12, humidifier off. Total cost under $400 for the battery, controller, and cable.
Here’s a complete setup for a DreamStation user camping in the desert.
Components:
- Philips DreamStation 2 (12V DC input)
- Renogy 12V 100Ah LiFePO4 Core Mini battery bank
- Renogy 100W N-Type foldable solar panel
- Renogy Rover 20A MPPT charge controller
- Genuine Philips DreamStation DC car adapter cable (with inline fuse)
- Optional: voltmeter or battery management system
Daytime: Solar panel → MPPT charge controller → 12V battery. A 100W panel in 5 peak sun hours delivers ~500Wh, well above the DreamStation’s 240Wh nightly usage.
Night: 12V battery → DC cable → DreamStation 2. No inverter. No conversion loss. The machine draws stable 12V directly from the battery.
Runtime math: 100Ah battery × 12V × 0.5 (50% DoD) = 600Wh usable. At 30W DreamStation draw, that is 20 hours — 2.5 nights before solar recharge becomes necessary.
Tips for Maximizing Solar CPAP Efficiency
Turn off the humidifier. The heated humidifier can triple CPAP power consumption. Off-grid therapy without heat humidification is standard practice. A passive HME (Heat and Moisture Exchanger) filter handles airway moisture without any power draw. Most camping CPAP users report the HME as sufficient for 1-2 week trips.
Reduce pressure if clinically appropriate. Consult your sleep physician before adjusting pressure. Each 2-3 cmH2O reduction in pressure typically cuts power draw by 15-25%.
Angle the solar panel toward the sun. A panel flat on the ground captures less energy than one angled toward the sun at 30-45 degrees. In fixed locations, face the panel south (northern hemisphere) for maximum daily output.
Check battery voltage before bed. A simple voltmeter confirms the battery reached adequate charge during the day. A 12V LiFePO4 battery at rest after solar charge should read 13.2-13.4V. Below 12.8V indicates partial charge.
Always Have a Backup
Solar fails. Cables break. Batteries have bad nights.
Size for the cloudy stretch, not the sunny day. A 100Ah battery holds roughly 2.5 nights of runtime at 30W draw. If two cloudy days in a row cut solar recharge to 30-40% of normal, that buffer is what keeps therapy running while you wait for sun. Sizing a battery to exactly one night of runtime means a single overcast day empties your margin completely. Build in at least one full spare night beyond what you expect to need.
One CPAP-focused site, SleepBackupLab, frames it well in its own solar guide. Campers with one power source and no backup plan skip therapy fast.
The easiest backup is free. Your car’s 12V outlet powers a DreamStation all night, no engine needed. Park with a full charge and the math works. Remember the DreamStation’s signal-matching requirement from earlier. Use the DreamStation-specific cable here too.
For non-DreamStation users, a 100-200Wh portable battery adds a backup therapy night. The backup need not match the primary system in size.
Cold weather adds a second layer of risk. LiFePO4 batteries won’t accept a charge below freezing, and capacity drops even when only discharging in the cold. On winter trips, keep the battery inside your sleeping bag or tent until bedtime rather than leaving it in a cold vehicle or pack overnight.
I’ve helped CPAP campers plan off-grid setups for eight years. The number-one failure I see: only one power path, no contingency. Plan for cloudy days before you leave home.
FAQs
Can I run a ResMed AirSense 10 on a 12V solar system?
Yes, with a step-up converter or via AC through an inverter. A direct 12V connection won’t work. A step-up converter adds conversion losses. For the most efficient setup, the DreamStation 1, 2, or Go wins.
Does a Transcend Micro run on 12V like other travel CPAPs?
No. That assumption costs people a wasted camping trip. The Transcend Micro needs 19V DC. Older Transcend Auto/II models need 18V. Neither runs on a plain 12V connection. You need a Transcend-specific step-up cable, same as Luna G3’s converter.
Can I use a portable power station instead of a 12V battery bank?
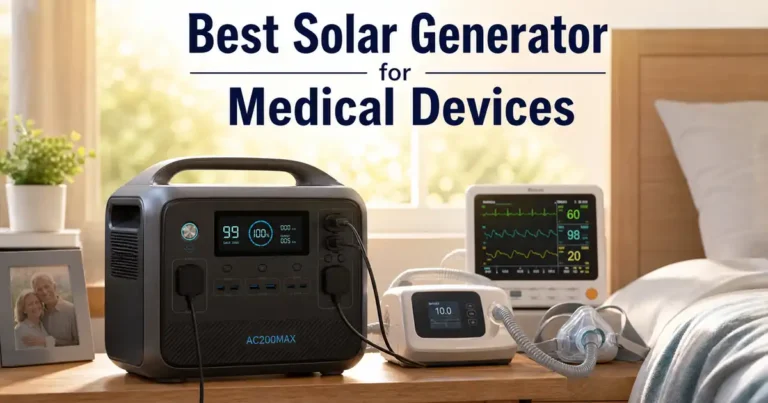
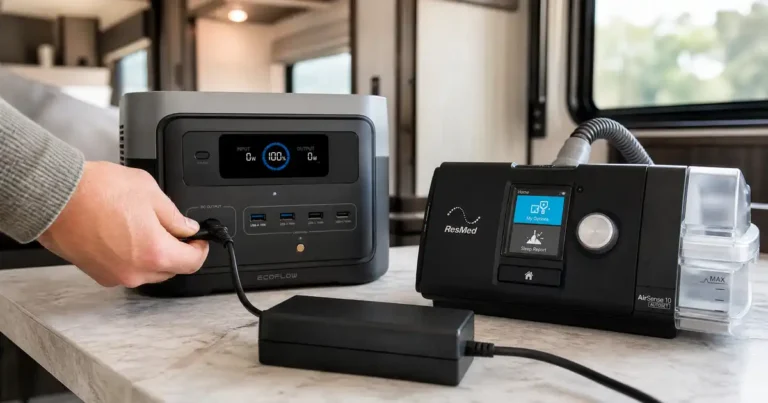
Yes. A power station with 12V DC output connects to the DreamStation directly. The solar panel recharges the station via its DC input. Portable power stations with built-in solar controllers (EcoFlow, Jackery) handle this automatically. The tradeoff: a power station costs more than an equivalent LiFePO4 battery.
How many solar panels do I need?
One 100W panel covers a moderate-pressure DreamStation user at five-plus sun hours. At lower sun exposure, cloudy days or northern latitudes, double the output. Two 100W panels is a comfortable all-weather setup for most CPAP users.
Can I run my CPAP directly from the solar panel without a battery?
No. Solar output fluctuates with cloud cover, panel angle, and time of day. CPAP machines require stable voltage. Always run CPAP from the battery. Let solar recharge it each day instead.
What does a 12V DC converter for CPAP solar actually do?
It matches voltage between battery and CPAP. A solar-charged 12V bank doesn’t output what every machine needs. DreamStation accepts 12V natively. Luna G3 needs 24V. Transcend needs 18-19V. The converter steps 12V up to whatever the machine requires.
Bottom Line
The 12V DC solar setup is the most efficient off-grid CPAP option. A DreamStation 2, 100Ah battery, and 100W panel provide indefinite camping therapy. No generator, no power station.
Key decisions: machine, battery, and panel — each sized to nightly need.
Need help choosing a battery to pair with your panel? My cpap battery backup guide covers the 12V solar-compatible picks. For power draw by machine, my cpap wattage breakdown has the figures. Not sure your machine takes 12V natively? My 12 volt cpap machine guide lists every DC-compatible option. Once you’ve picked a machine, my cpap 12v adapter has the spec.